Make a Loom to Weave Patterns
This activity is an expanded version of the one seen on the video above.
Learning Goal
Patterns are sequences of things in our world — like numbers, colors or shapes — that repeat over and over and follow a rule. For example, the pattern one, two, one, two, one, two is an alternating pattern that repeats the numbers one and two. In this activity, you will help your child learn about patterns while weaving ribbons on a loom made from popsicle sticks!
Materials

- 4 popsicle sticks
- 4-5 feet of string (for the loom)
- 6-inch square piece of fabric
- Ribbon or yarn
- Scissors
- Hot glue gun, glue or tape.
Step-by-Step Instructions
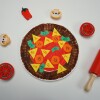
1. Create the frame of your loom. Arrange four popsicle sticks into a square. An adult can then use a hot glue to attach the four corners of the square together or tape them together. Alternatively, use glue and wait 30 minutes for it to dry.
2. Cut the fabric, ribbon and yarn into pieces that are a few inches longer than your popsicle sticks.
3. Practice making repeating patterns while laying out the materials on the table. You can start by creating your own pattern for your child to copy. For example, your pattern could be ribbon, yarn, ribbon, yarn. Ask your child “Can you copy this pattern?”

4. Next, help your child to create their own pattern. Ask your child to pick two pieces of material that are different colors or fabric. Then, ask “How are these two pieces different from each other?”
5. Patterns repeat over and over and follow a rule. Identify the rule for your pattern and ask your child to predict what comes next. You can say “The first two pieces are red and blue. Which two pieces should come next in our pattern? That’s right: the pattern goes red, blue, red, blue, red, blue!” Ask your child to extend the pattern. “Can you find two more pieces that are red and blue to continue the pattern?”
6. Help your child attach the vertical threads to the loom. This process itself involves a repeating pattern! Start by tying one end of the long string in a knot around the popsicle stick at the bottom of the square (wrap the string into a loop around the stick, then pull one end through and tighten). Next, wrap the string twice around the popsicle stick at the top of the square. Pull the string down and wrap twice around the popsicle stick at the bottom of the square. Ask your child, “What comes next?” Repeat this pattern until the loom has six or more vertical threads. Try to make the space between the vertical threads as even as possible. Tie the other end of the string around the bottom popsicle stick and trim off any extra.
7. Adjust the vertical threads so they are even by pushing the string along the popsicle sticks. If they slide, secure them in place by adding a drop of glue on the string where it is wrapped around the popsicle stick.
8. Before you begin to weave, ask your child to choose a repeating pattern for the materials that will determine the appearance of the final product. You can say, “What two or three pieces of material will start the pattern? What colors or materials are they?” Lay out the pieces of material and ask “What comes next?” Ask your child to find the materials to complete the pattern. Continue until you have organized all the materials into a pattern.
9. Weaving involves making patterns with movement. Model for your child how to pull the piece of material over or under the vertical threads in the loom. You can say, “Over, Under. What comes next in the pattern? That’s right! Over, under, over, under.” Have your child say the movements in the pattern aloud while weaving. When weaving another material into the loom, ask your child to start the pattern by pulling under, then over. “Under, Over. What comes next in the pattern?”
Take It Further
- Create more complex patterns. Create an added challenge by making a new pattern that starts with three pieces of materials. For example, yellow, red, green, yellow, red, green, etc.
- Measure and count your pattern: Measure the string, ribbon or fabric pieces before weaving to find out their lengths. Use a collection of identical small objects like pennies to find out how many “pennies” long a material is. You can do this by stacking the pennies side by side along the material until you reach the end. Model counting each penny out loud to your child, repeating the last number to show how many there are all together. Measure multiple objects and ask your child to compare if the object is shorter, longer, taller or the same.
Book Suggestion
- “Pattern Fish” written by Trudy Harris and illustrated by Anne Canevari Green
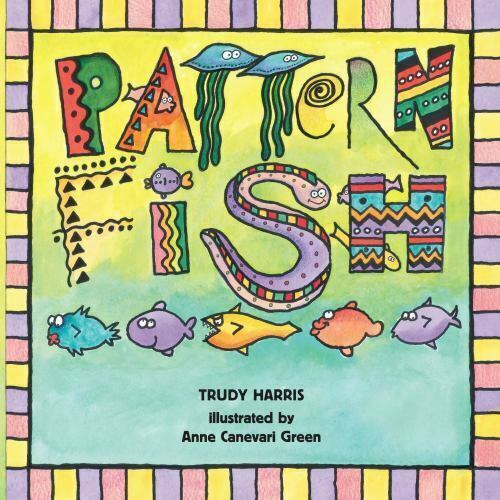
This colorful picture book is full of visual and verbal patterns. Ask your child to help find all the patterns in the words and illustrations on each page.
Related Workshop
This activity is part of our Patterns workshop, which helps parents and caregivers playfully build children's ability to recognize, complete and create patterns.